

Accept crypto with CoinGate
Accept crypto with confidence using everything you need in one platform.
How to Customize Merchant’s Crypto Invoice Page: Step-by-Step Guide
Now, our merchants can enable and disable specific coins, change their positioning on the invoice, and set settlement currencies to each digital asset. Continue reading to learn how to do it.
The feature got a lot of interest from our customers. Thus we decided to make a step-by-step guide, explaining how certain features work, as well as how to modify the invoice itself. So, without further ado, let’s start setting up a customizable invoice!
Note: To avail of the feature, first you must have an account on CoinGate.
How to access invoice customization option
Customization features are available only after integrating one of our payment methods, e.g., a payment button, API connection or Point of Sale (web version only). If you already have a payment option set up, proceed to step 2.
Step 1: Create an integration method
Go to the “Dashboard”, select the “Merchant” section and proceed to “Payment Buttons”, “API/app”, or “Point of Sale” tabs, depending on the integration method you want to set up.
To create a payment button, click on “Add New”, fill in all the necessary details and finalize the integration method.
If in need of a web PoS, click on “Request POS Access” and submit a ticket. We will get back to you in 24 hours.
To connect via API, press the “New App” button, fill out the form and proceed. For further steps, check the API documentation for merchants.
Note: When creating API credentials, you need to select “Custom settings (advanced)” option under the “Settlement Setting” section to access the custom invoice feature.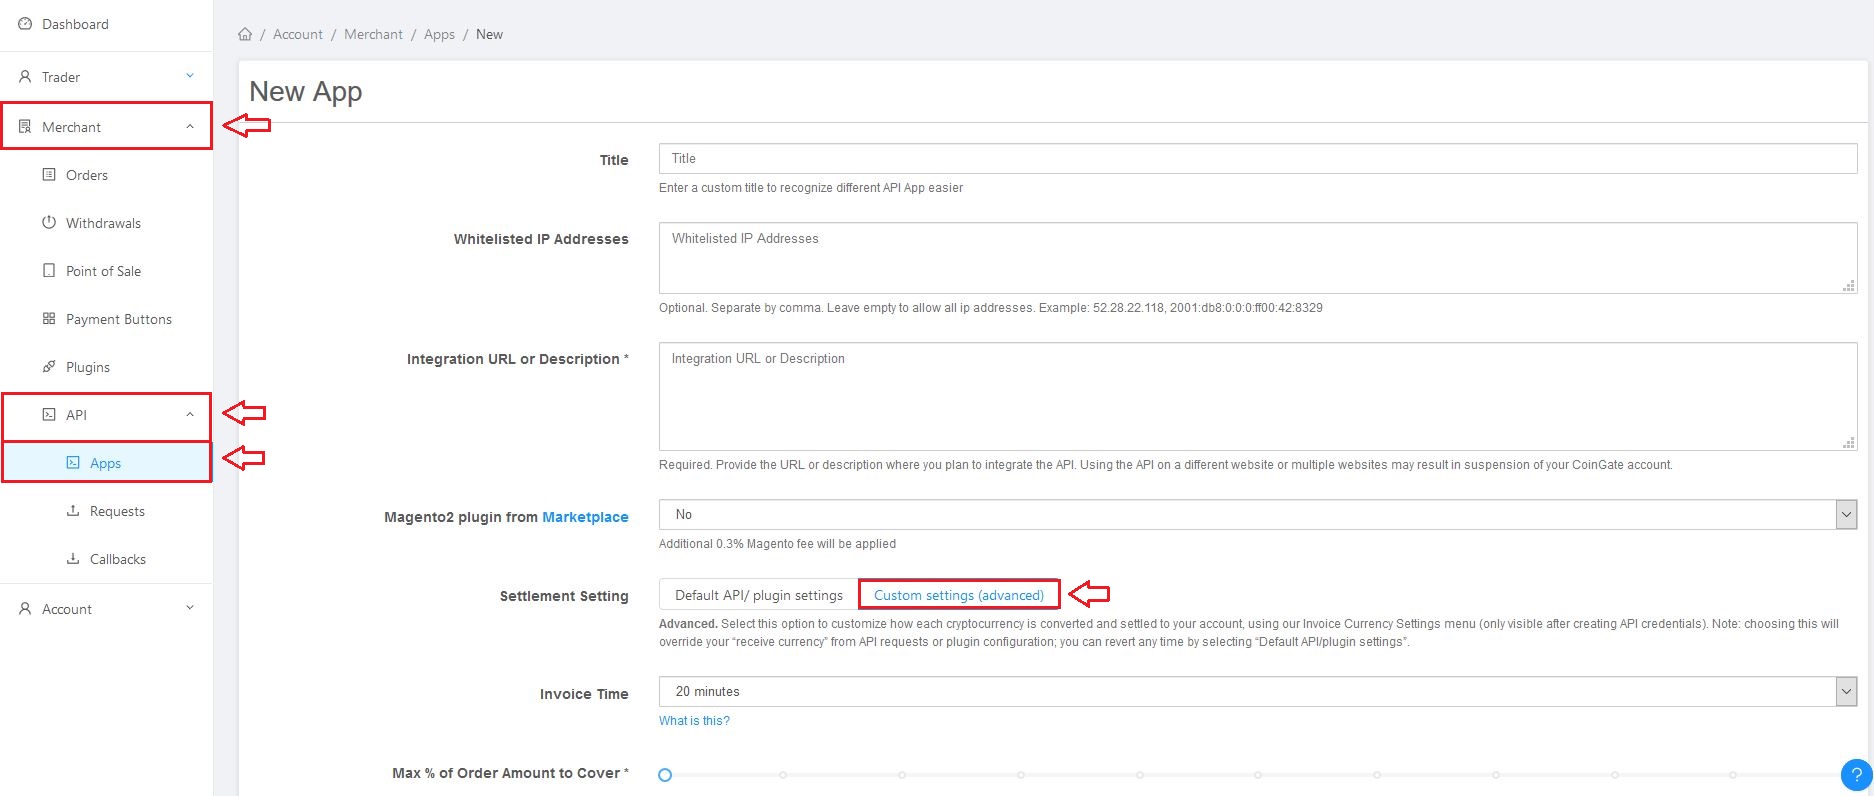
Step 2: Open the customization window
Once the integration is ready, you will be able to make changes on your invoice page. When finalizing the integration, merchants are usually redirected to the invoice customization page immediately, but with some methods, you have to access it manually.
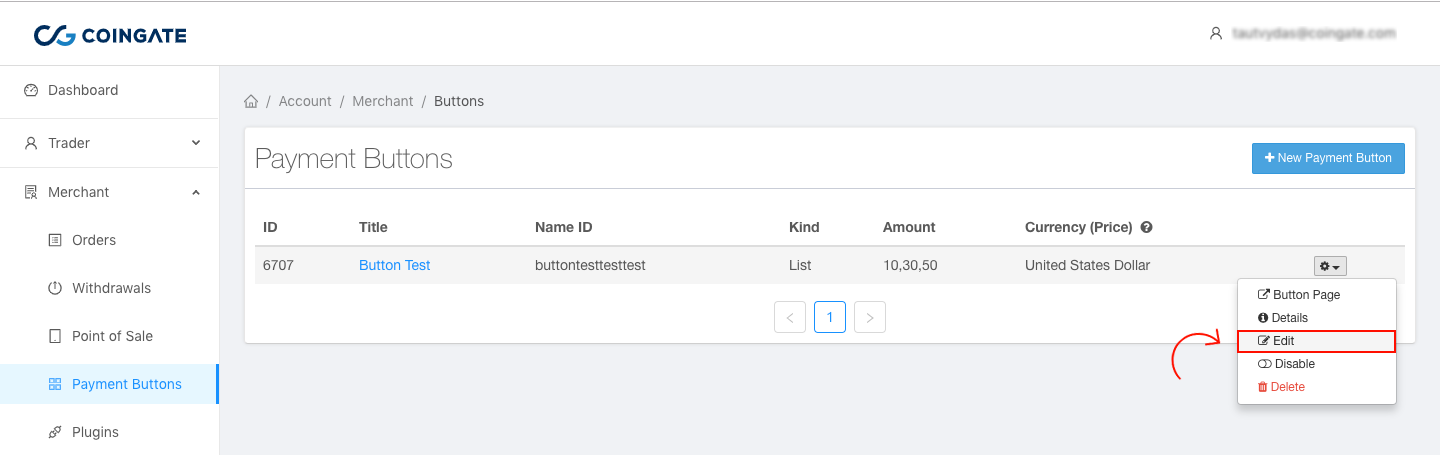
To open a customization window by yourself, go to the chosen integration page, click on the settings icon and select “Edit”. You will then see the option to customize the invoice.
Step 3: Start building your invoice
Once the customization window is open, you will be ready to make changes on your invoice page. Note that you are able to customize each integration individually, meaning you can set up different invoice page for each integration method.
What can I customize?
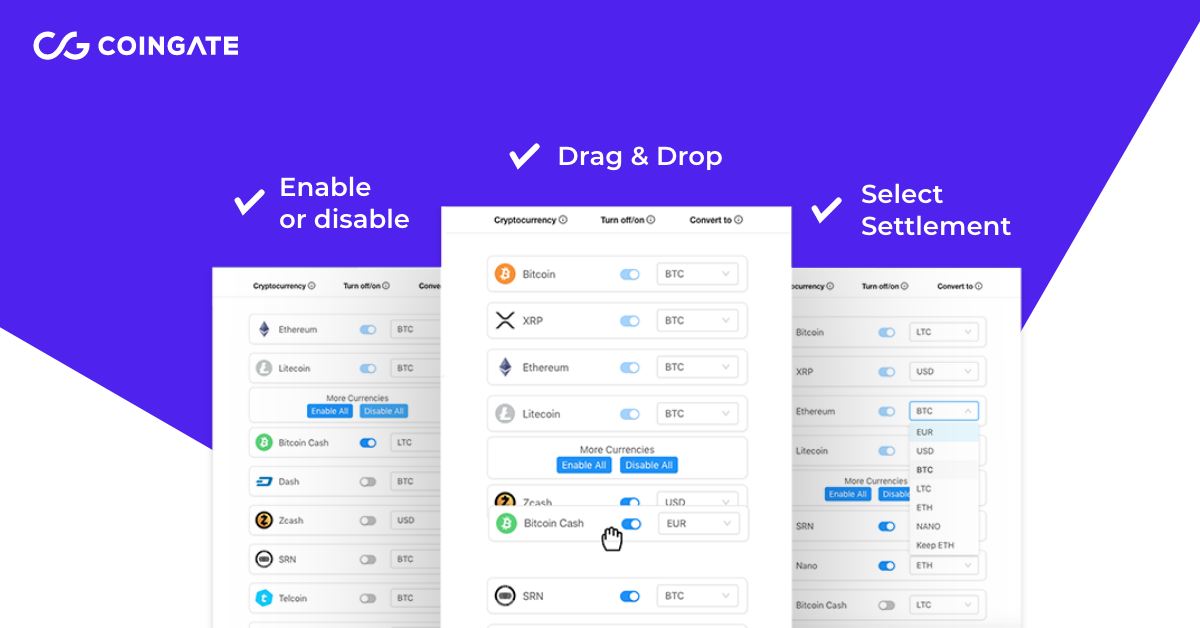
There are three main things that you can change on your invoice page – control which coins you want to accept, decide how the invoice layout will look like, and select the settlement currencies for all coins that your shoppers are paying with. To understand each feature better, let’s examine them all one by one.
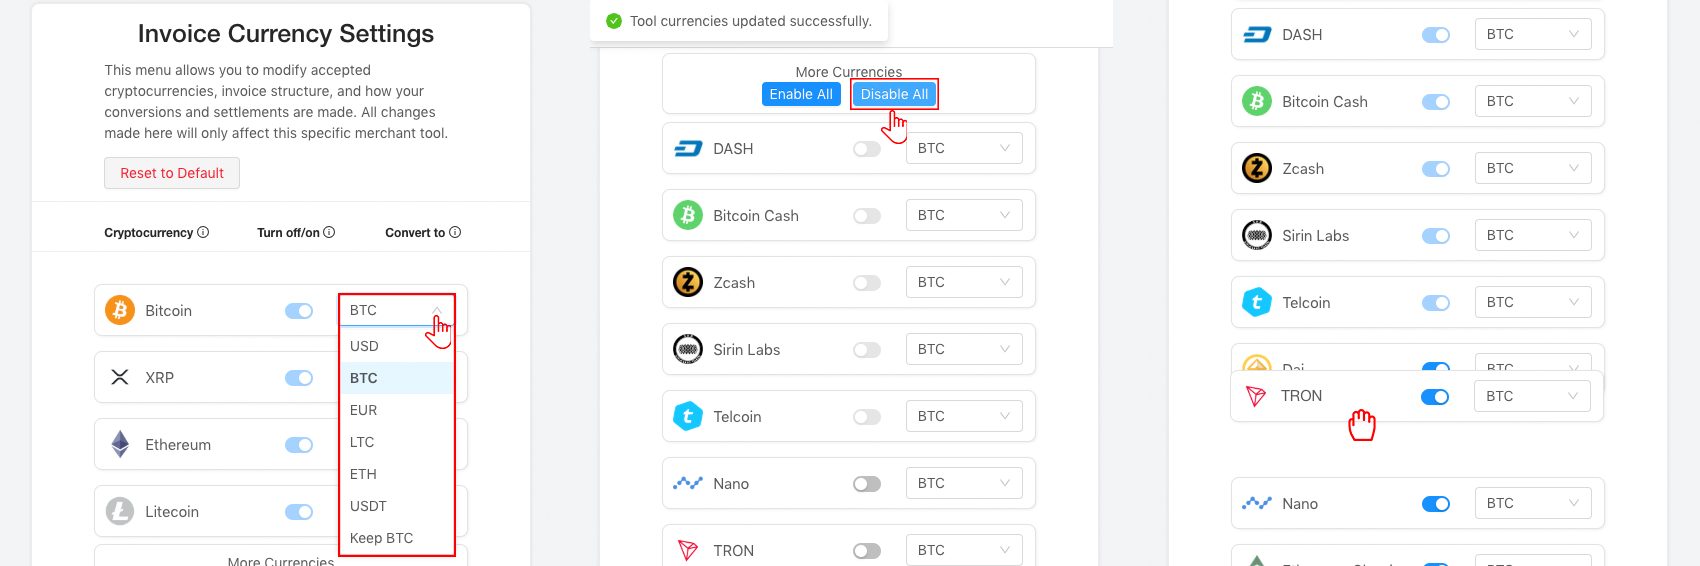
Enable or disable coins
Feel free to narrow your list of cryptocurrencies by turning off those you don’t want to accept. To do that, use the switch button next to a digital asset’s title. Alternatively, you can use “Enable All” or “Disable All” functions.
However, the main four currencies (Bitcoin, XRP, Ethereum, and Litecoin) cannot be turned off manually. If you want to accept just one specific cryptocurrency or a few, please refer to support@coingate.com.
Drag and drop
Change the position of any Altcoin listed in “More Currencies” tab. Just select the currency and drag it to the place where you want to keep it. Four top coins always remain locked.
Choose settlements
As a merchant, you have an option to choose how to want to proceed with your cryptocurrency revenue. You can choose to either settle a particular coin to fiat currency (Euros or the US Dollars), or to most of our natively integrated digital assets. You can customize settlements of every single coin you see on the invoice.
Example #1: You have an online store which accepts cryptocurrency payments via CoinGate. However, you’re not that into cryptocurrency yourself, and you only want to have some additional payment options for your customers. Thus you decide to settle all your cryptocurrency revenue to Euros or the US Dollars and receive it in a bank account.
Example #2: You are a keen supporter of stablecoin USDT, and you have just implemented CoinGate payment solution to your enterprise for that exact reason. Now, you can receive USDT payments and keep USDT revenue as it is. Additionally, you can set all other cryptocurrencies on the invoice to be converted to USDT immediately after the purchase.
Example #3: You adore all cryptocurrencies and wish you could keep them all. In this case, you can keep all native digital assets that we support – simply select “Keep (currency)” option in the drop-down menu.
Hopefully, this guide was helpful. If you have any questions related to the invoice customization or anything related to CoinGate, visit our support page.
Accept crypto with CoinGate
Accept crypto with confidence using everything you need in one platform.