

Accept crypto with CoinGate
Accept crypto with confidence using everything you need in one platform.
How to set up the Toast wallet for XRP
Since we integrated XRP payments for our merchants, we got a lot of interest from the community. As a result of the integration, you are free to spend XRP at thousands of our merchants, but first, you will have to find yourself a decent XRP wallet.
To help you out with the matter, we have recently reviewed the top XRP wallets you should consider choosing. However, if you are not yet comfortable with setting up wallets, we are here to walk you through it.
In this step-by-step guide, we will show you how to set up a Toast wallet for XRP payments from the beginning until the end.
How to use a Toast wallet: a step-by-step guide
Step 1: Install Toast wallet client
Toast is a free open source XRP Wallet for iOS, Android, Windows, Mac, and Linux. You can download it from its official website. The installation process is pretty straight-forward and goes the same way as installing any other software.
Step 2: Go through the license agreement
Once you finalize the installation and open the wallet, the license agreement will pop up. You will see an important notice right away, telling you that there is a 20 XRP reserve requirement for the activation of a wallet.
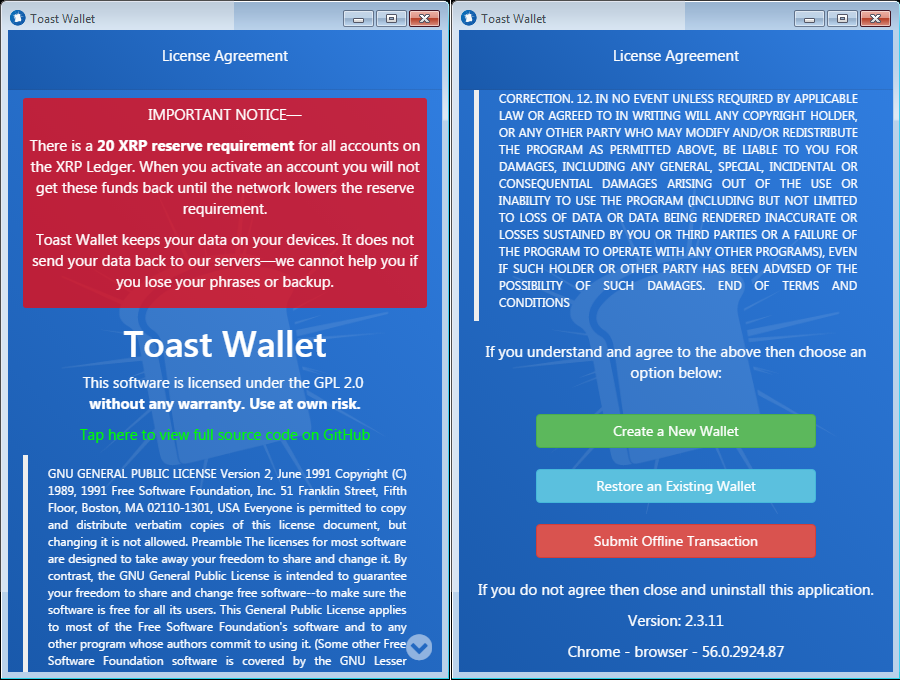
The first thing to know about any XRP wallet is that in order to use it, you have to deposit 20 XRP to it first. It is an in-built rule of XRP that protects the shared global ledger from growing excessively large as the result of spam or malicious usage. You can read more about the reserve requirements in the official documentation.
However, we will come to it later on. Now, press “Create a New Wallet” button.
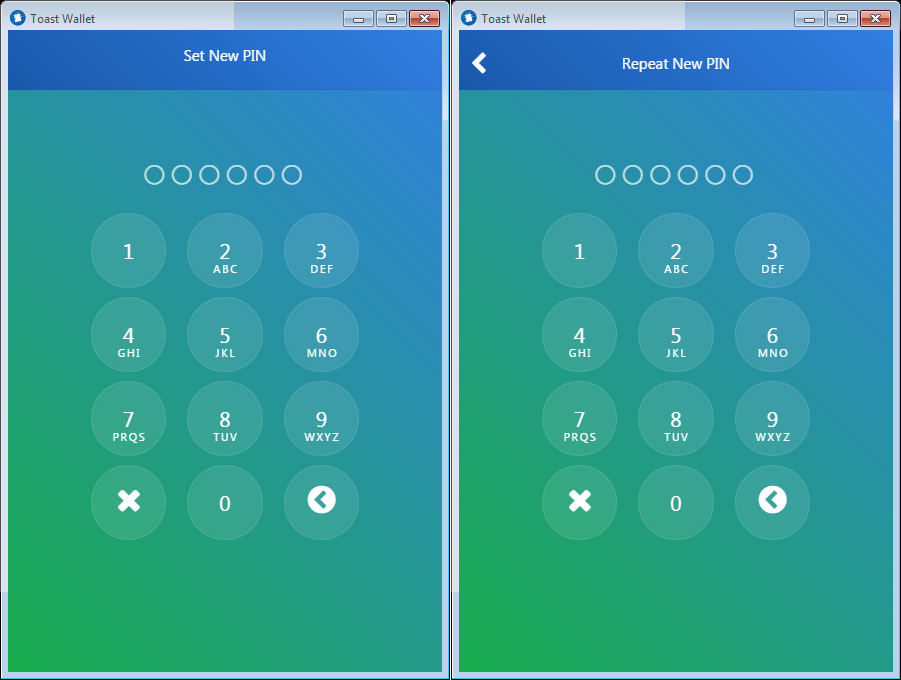
Step 3: Set your PIN
Next stop – creating your 6-digit PIN. It serves as an app privacy guard to stop anyone who obtains your device from checking out your XRP balance. It is important to never forget your PIN. Otherwise, you will have to use your recovery phrase in order to recover it.
Step 4: Set a passphrase
Now, it is time to set your passphrase which will encrypt your wallet. It should include both upper-case and lower-case letters, numbers and symbols to make it as strong as possible. Not sure how to come up with a good password? Check out our security guide where we explain the techniques for creating a strong passphrase.
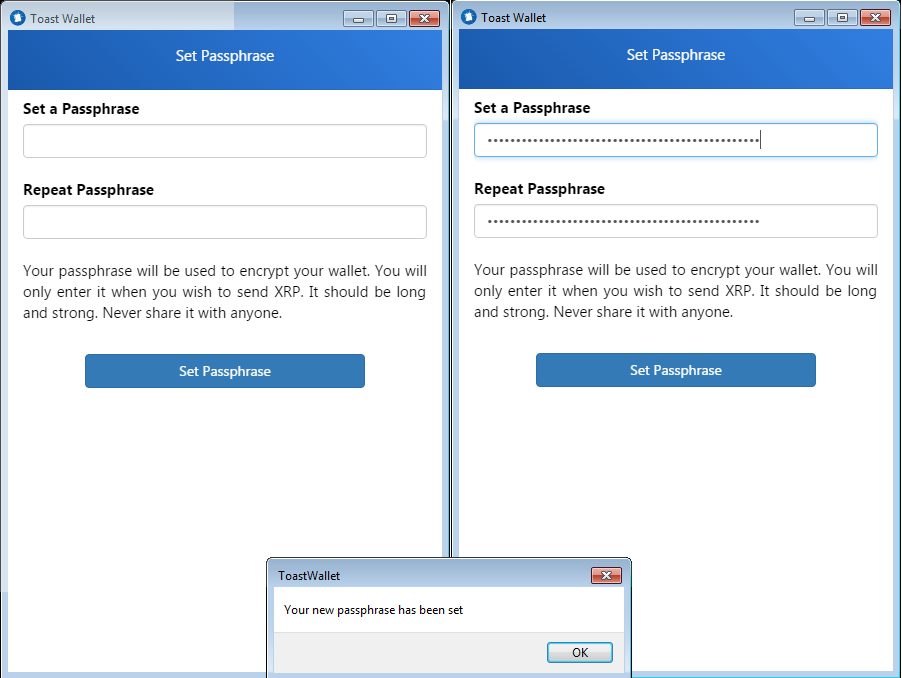
You will have to use it every time you will make a transaction, so keep it private and do not share it with anyone. When ready, press “Set Passphrase”.
Step 5: Write down your recovery phrase
After you set up the passphrase, you will see a window with six words presented to you. It is very important to write them down and keep them in a safe place, preferably offline. You will need them in case you forget your passphrase or PIN.

Once you are done, confirm that you wrote the words down and that you understand their purpose by clicking on two switches, then click “Finish Setup”.
Step 6: Get a wallet address
We are almost done. Only a few steps left until you will be able to fully utilize your new XRP wallet. But first, you will need to create one (assuming you don’t have one yet). You have two options here – either generate a new address or get a vanity address.
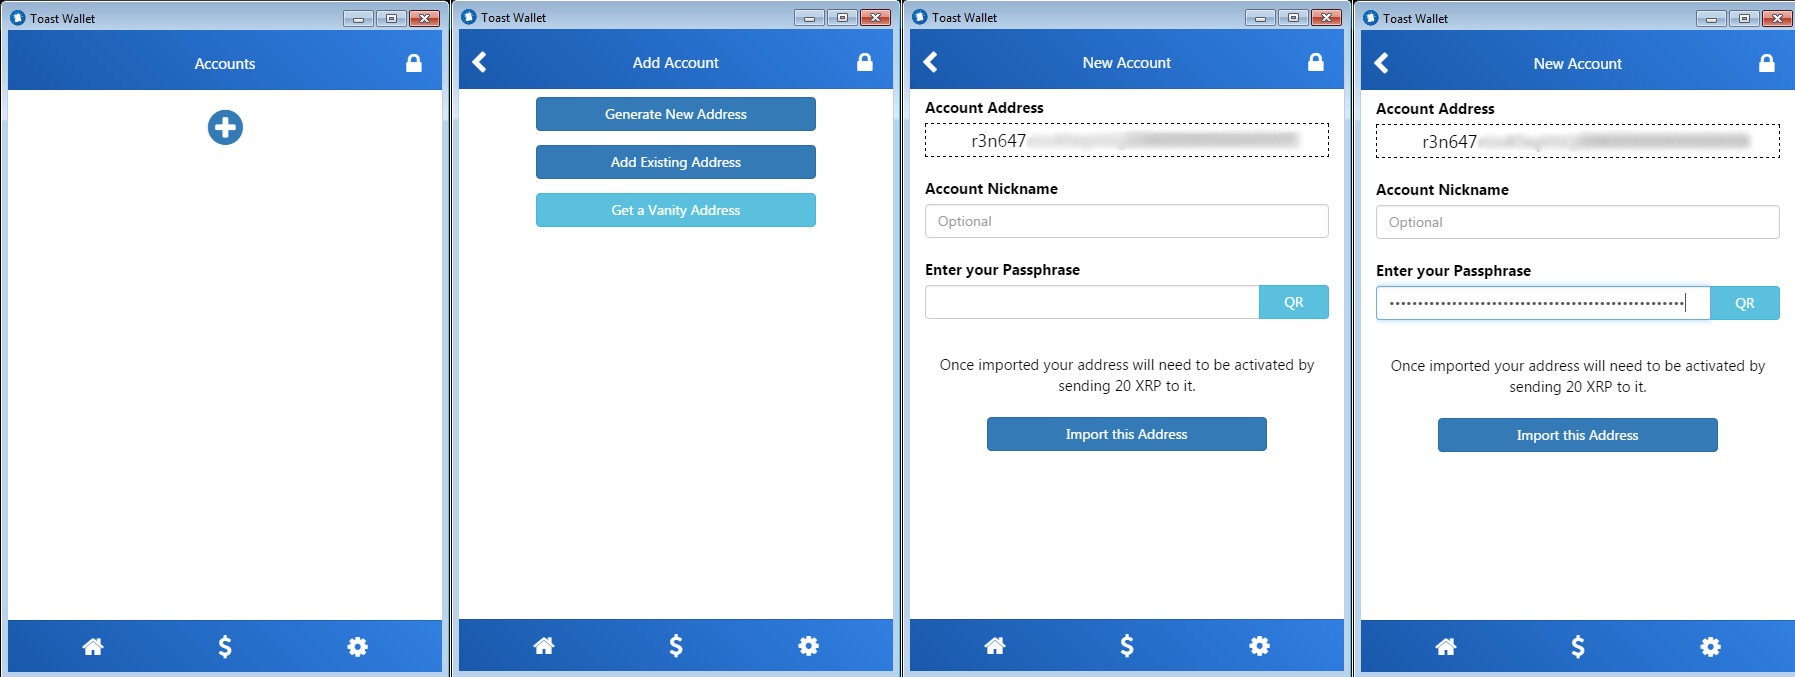
Vanity address option lets you create a custom wallet address which contains certain starting letters that spell out words you want, for example, your own name. We will use it in this guide just to showcase it.
Press “Get a Vanity Address”. Proceed by creating your account address and entering your passphrase. Nickname is optional. When ready, press “Import this Address”.
Step 8: Secure your wallet backup
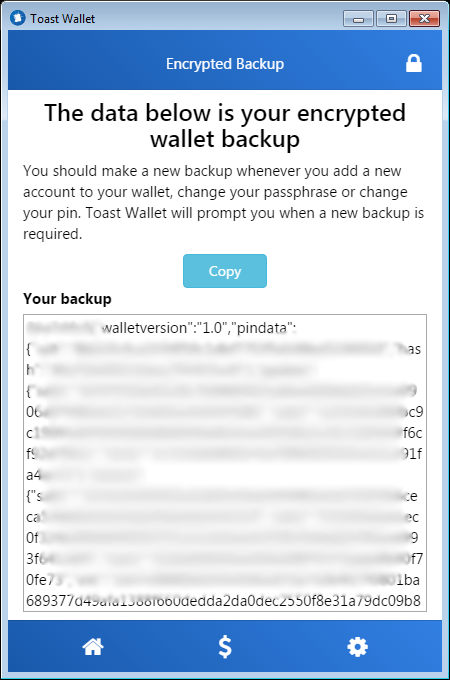 Now, the most important step – securing your encrypted wallet backup. Without it, you will not be able to add a new account to your wallet, change your password or PIN. To get your backup, go to the “Settings” menu. Once you see the window with the encryption key, save it and store it in a safe place like Trezor or Nano Ledger cold storages.
IMPORTANT: You must do a backup only after adding all the addresses you wish to use on Toast wallet.
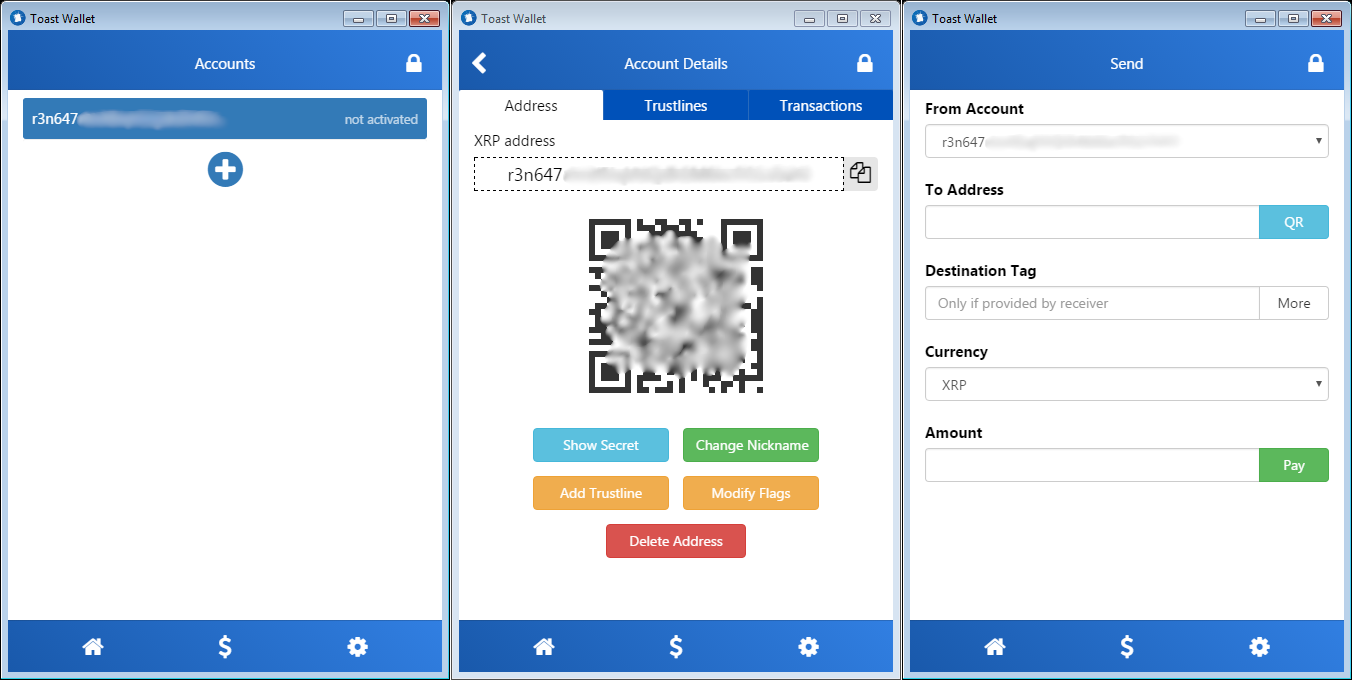
Step 9: Use the wallet for sending or receiving
Done! Just press on your wallet address and you are ready to send and receive transactions with XRP. Nothing too special there – Toast works the same way as any other wallet.
Hopefully, this guide was useful to you. If you encounter any issues or have questions, we suggest checking out the Toast wallet FAQ.

Accept crypto with CoinGate
Accept crypto with confidence using everything you need in one platform.